Mobile / WhatsApp
E-mail
Table of Contents
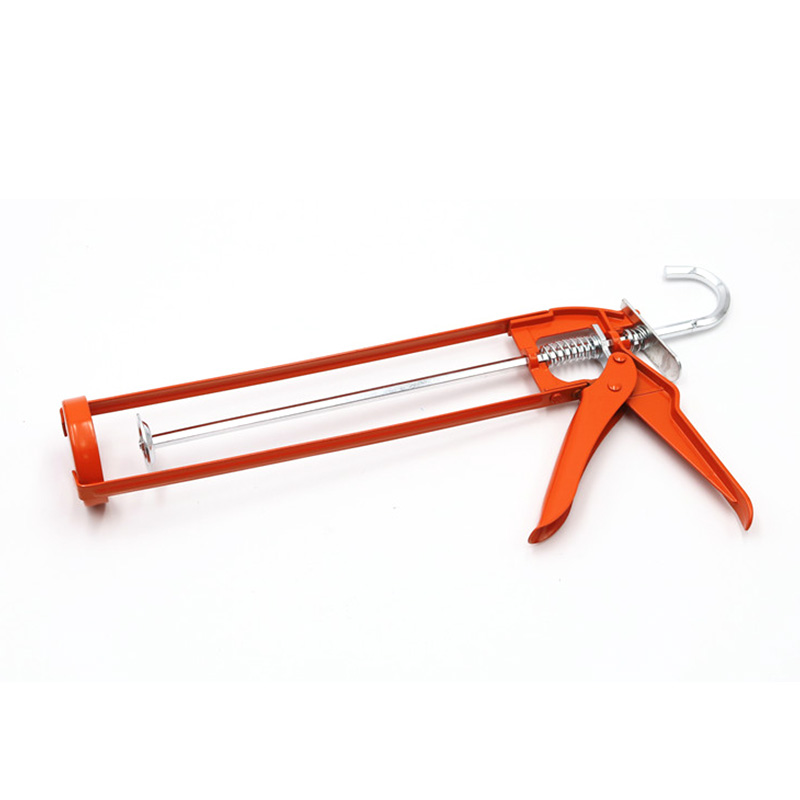
To use a caulk gun, pull back the rod, load the cartridge, cut the nozzle, puncture the inner seal, squeeze the trigger steadily at about 45 degrees, then release the pressure to stop the sealant flow.
A caulk gun looks simple, but many sealing problems come from loading the tube incorrectly, cutting the nozzle too large, forgetting to puncture the inner foil, moving too fast, or failing to release the pressure after application. Whether you are using silicone sealant, acrylic caulk, PU sealant, MS sealant, or a sausage package sealant, the basic goal is the same: create a continuous, controlled bead that fills the joint without gaps, bubbles, or excess mess.
The easiest way to use a caulk gun is to follow six steps: load the sealant, cut the nozzle, puncture the seal, apply a steady bead, release the pressure, and tool the joint before the sealant skins over.
Press the release lever, pull the rod back, place the cartridge into the frame, and push the rod against the back of the tube.
Cut the nozzle at a 45-degree angle. Start with a small opening because you can always cut it larger later.
Use the built-in puncture tool, a long nail, or a seal punch to break the inner foil before squeezing the trigger.
Hold the gun at about 45 degrees and move at a steady speed so the sealant fills the joint evenly.
Press the release lever or pull the rod back slightly to stop pressure and prevent sealant from oozing out.
Smooth the bead with a tooling tool or suitable method before skin-over, then clean excess sealant based on product type.
Common caulk guns include manual cartridge guns, dripless caulk guns, heavy-duty sealant guns, sausage caulk guns, pneumatic caulk guns, and battery-powered caulk guns. The right choice depends on the sealant package, viscosity, job size, and required control.
| Caulk Gun Type | Best For | Advantages | Reminder |
|---|---|---|---|
| Manual cartridge gun | Standard 300 ml or 310 ml cartridges. | Simple, affordable, and suitable for small to medium jobs. | Requires hand pressure and steady movement. |
| Dripless caulk gun | Cleaner indoor work and DIY use. | Reduces oozing after trigger release. | Still needs proper trigger control. |
| Heavy-duty sealant gun | High-viscosity silicone, PU, MS, or construction sealants. | Higher thrust ratio and easier extrusion. | Useful when normal guns feel too hard to squeeze. |
| Sausage caulk gun | 400 ml, 500 ml, 600 ml sausage sealant packs. | Good for professional use and larger-volume sealing. | Requires correct nozzle, cap, and plunger setup. |
| Pneumatic or battery gun | Repeated long beads and high-volume jobs. | More consistent flow and less hand fatigue. | Flow speed must be adjusted carefully. |
Cartridge sealant needs a cartridge caulk gun, while sausage sealant needs a sausage caulk gun or a convertible bulk gun. The package type must match the gun body, plunger, nozzle, and cap system.
| Sealant Package | Common Size | Matching Gun | Use Case |
|---|---|---|---|
| Plastic or aluminum cartridge | Usually around 300 ml or 310 ml. | Standard cartridge caulk gun. | DIY jobs, small repairs, bathrooms, kitchens, windows, trims. |
| Sausage pack | Often 400 ml, 500 ml, or 600 ml. | Sausage caulk gun with barrel, nozzle, cap, and plunger. | Professional construction, larger joints, lower packaging waste. |
| Bulk sealant | Pail, drum, or bulk container. | Bulk dispensing system or pneumatic equipment. | Industrial or repeated production-line sealing. |
Before starting, check the sealant package and viscosity. A thick PU or MS sealant may need a higher-thrust gun than a basic acrylic caulk. Using the wrong gun can make the trigger hard to squeeze, create uneven beads, or damage the package.
To load a cartridge into a caulk gun, press the release lever, pull the metal rod fully back, place the cartridge into the frame with the nozzle forward, then push the rod until the plunger touches the cartridge base.
Press the release lever: this frees the push rod so it can move backward.
Pull the rod back: make enough space for the cartridge.
Insert the cartridge: place the nozzle end into the front opening first, then lower the back of the cartridge into the frame.
Push the rod forward: the plunger plate should sit against the cartridge base.
Squeeze lightly: apply gentle pressure only after the nozzle is cut and the inner seal is punctured.
Do not force the trigger before opening the cartridge. If the nozzle is still sealed, pressure can build inside the tube and cause leakage, cartridge swelling, or sealant bursting from the back.
To use a sausage caulk gun, unscrew the front cap, pull back the rod, insert the sausage pack into the barrel, cut the pack end, install the nozzle and cap, then squeeze the trigger to push sealant through the nozzle.
Key reminder: cartridge guns and sausage guns are not loaded the same way. A sausage pack needs a barrel-style gun, a proper front cap, and the correct plunger setup.
Open the front cap: remove the cap and nozzle holder from the barrel.
Pull the rod back: create enough space inside the barrel.
Insert the sausage pack: place it fully inside the barrel.
Cut the end of the sausage: cut only the end that will face the nozzle.
Install the nozzle: put the nozzle into the cap and screw it back tightly.
Apply steadily: squeeze the trigger and move at a consistent speed.
Cut the nozzle at a 45-degree angle and make the opening slightly smaller than the joint width. Then puncture the inner foil seal inside the cartridge before squeezing the trigger.
| Step | Correct Method | Common Mistake |
|---|---|---|
| Cut the nozzle | Cut at 45 degrees and start with a small opening. | Cutting too large creates too much sealant and messy edges. |
| Match bead size | The opening should match the gap or be slightly smaller. | Using one large nozzle opening for all joint sizes. |
| Puncture the seal | Push a puncture tool through the nozzle into the inner foil. | Forgetting this step, then thinking the caulk gun is broken. |
Holding the caulk gun at about 45 degrees helps the nozzle guide the sealant into the joint instead of only laying it on the surface. This angle also improves visibility, bead control, and contact with both sides of the gap.
Better joint filling: the nozzle pushes sealant into the gap instead of leaving a weak surface line.
Cleaner bead shape: the angled cut helps form a smoother bead.
More consistent contact: sealant should touch both sides of the joint for better adhesion.
Easier movement control: the gun can move along the joint without blocking your view.
For most joints, move the caulk gun along the seam while keeping steady pressure on the trigger. Some installers prefer pushing the bead; others prefer pulling. The best method is the one that fills the joint continuously without gaps, skips, or air pockets.
Control bead width by cutting the nozzle correctly, squeezing the trigger evenly, and moving the caulk gun at a steady speed. If the bead is too thick, move faster or reduce pressure. If the bead is too thin, move slower or apply slightly more pressure.
The nozzle may be cut too large, the trigger pressure may be too strong, or the gun may be moving too slowly.
The opening may be too small, the inner seal may not be fully punctured, or the gun may be moving too fast.
Uneven hand speed, stopping and starting, dirty joints, or wrong gun pressure can create waves and gaps.
Practice on cardboard before working on a visible joint. This helps you understand how the sealant flows, how much trigger pressure is needed, and how fast to move the gun.
To stop sealant flow, release the trigger and press the release lever so the push rod no longer presses against the cartridge. On some guns, you may need to pull the rod back slightly. Dripless caulk guns reduce this problem automatically.
If sealant keeps coming out after you stop squeezing, the gun is still under pressure. Release the rod pressure immediately after each bead.
This step is especially important with silicone sealant, PU sealant, MS sealant, and other thicker products. If pressure remains in the tube, the sealant will continue to ooze from the nozzle and create waste, messy surfaces, and uneven starts on the next bead.
Tooling means smoothing and shaping the sealant bead before it skins over. A properly tooled bead improves contact with the joint sides, creates a cleaner finish, and reduces weak spots.
| Sealant Type | Tooling Advice | Cleaning Reminder |
|---|---|---|
| Acrylic caulk | Smooth before drying; good for paintable interior joints. | Clean uncured material with water according to product instructions. |
| Silicone sealant | Tool quickly before skin-over; avoid overworking the bead. | Cured silicone is difficult to remove; clean mistakes early. |
| PU or MS sealant | Tool within the open time and keep the bead continuous. | Use compatible cleaner and follow the product TDS or SDS. |
Masking tape can help create clean lines, especially around sinks, countertops, glass, tiles, windows, and decorative joints. Remove the tape before the sealant fully skins over, or the edge may tear.
Most caulk gun problems come from an unopened inner seal, a blocked nozzle, wrong gun type, too much pressure, expired sealant, or failure to release the push rod after application.
| Problem | Likely Cause | Solution |
|---|---|---|
| No sealant comes out | Inner foil not punctured, nozzle blocked, or sealant cured inside. | Puncture the seal, clear the nozzle, or replace expired/cured material. |
| Sealant leaks from the back | Too much pressure before opening the nozzle or damaged cartridge. | Stop squeezing, release pressure, check the cartridge, and replace if damaged. |
| Sealant keeps oozing | Rod pressure has not been released. | Press the release lever or pull the rod back slightly after each bead. |
| Trigger is too hard to squeeze | High-viscosity sealant, cold material, small nozzle, or weak gun. | Use a larger nozzle opening, warm the cartridge to recommended conditions, or choose a higher-thrust gun. |
| Bead is uneven | Inconsistent trigger pressure or movement speed. | Practice a steady motion and keep the nozzle angle consistent. |
A caulk gun works by pushing a rod against the back of a cartridge or sausage pack, forcing sealant through the nozzle when you squeeze the trigger.
Press the release lever, pull back the rod, place the cartridge into the frame, and push the rod forward until it touches the cartridge base.
Load the silicone cartridge, cut the nozzle, puncture the inner seal, apply a steady bead, release pressure, and tool before skin-over.
The inner foil may not be punctured, the nozzle may be blocked, the opening may be too small, or the sealant may be expired or cured inside.
Release the trigger and press the release lever so the rod stops pushing the cartridge. On some guns, pull the rod back slightly.
Open the barrel cap, insert the sausage pack, cut the pack end, install the nozzle, screw the cap back, and apply with steady pressure.
The final rule is simple: match the gun to the sealant package, cut a controlled nozzle opening, puncture the seal, apply at a steady angle, release pressure after each bead, and tool the sealant before it skins over.
LOTFIX provides silicone sealant, acrylic sealant, PU foam, adhesive, hybrid sealant, PU sealant, caulking guns, foam guns, and related construction material solutions for sealing, filling, bonding, waterproofing, gap protection, and installation applications. If you are comparing sealants and tools for bathrooms, kitchens, windows, doors, tile joints, construction gaps, or general sealing work, you can visit the LOTFIX homepage to learn more about available product categories.
If you have questions about sealant selection, caulk gun matching, application scenarios, packaging options, or cooperation requirements, please Contact Us.